You can add custom content to cody by some new rendering functions in your custom controller. In this example the custom content will be a top 5 list of classic cars that are currently liked on a random social network site (fictional).
Example 1: top 5 list of cars
Step 1: Writing a render function in your custom controller
Writing a rendering function is just like writing any other function in your custom controllers, you just need to return a string with the html that contains the rendered content.
Like this:

Note: The render function can't execute MySQL query's, so make sure that you execute your query's in the doRequest() function and store the data in a context variable
Step 2 : Editing the view
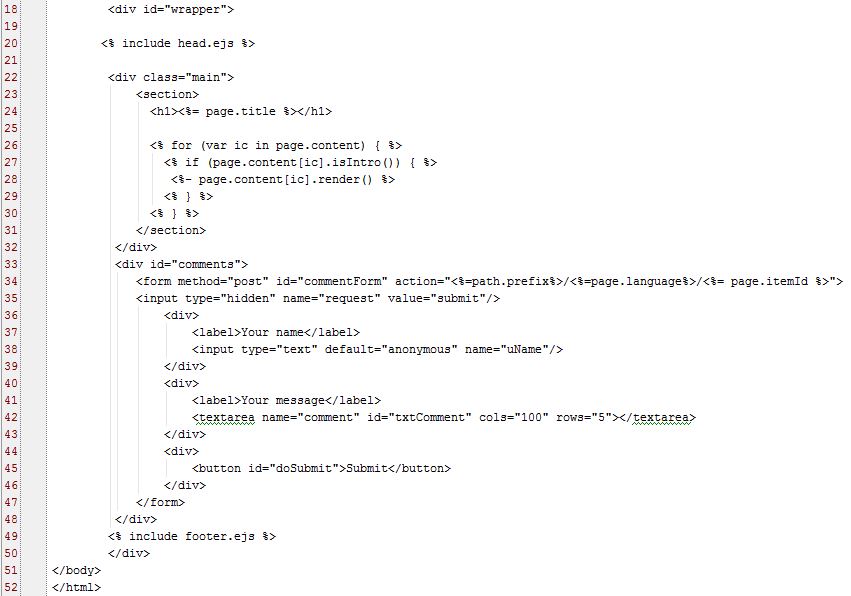
First let’s take a look to the original index file.

As you see, the normal content is rendered by the function render({not_kind: ‘C’}). You could also render the intro content by using intro:’Y’

Or you can choose not to render the intro by using the parameter 'N'.

The render function supports the following parameters:
- name
- not_name
- not_kind
- kind
- intro
Now let’s take a closer look to these parameters before continuing.
Name & not_name
Just type in the name of the content type and it will be rendered (name) or everything will be rendered except the content type of your choice (not_name)
To demonstrate this I will have a page with a text block and a string. First we will only render the text block .

Now by using not_name we will only render the string (a element).

Kind & not_kind
With kind you specify the content-type to be rendered in that block. You have a few content types:
- T: Text
- S: String
- M: Form
- I: Image
- F: File
if you use a content-type that is not in this list the request will be sent to the controller. The controller will execute the render function you have specified earlier.
So let’s render all the content in one div, and all the custom content in another div
Step 3: Creating a new template
In order to render your new custom content you will need to add a new template. You can choose to do this in the GUI of Cody or directly in the database.

Now we add a new page with this template (let's call it start).

Now if we view this page.

What’s this, this is the car view, and not the normal page with our custom content? What now?
We need to edit our controller to handle these requests. We will do this in the next step
Step 4: changing the controller to handle render requests
Now our controller looks like this:

The controller will return the carview.ejs every time, that's not what we want. Let's start by changing the doRequest function to handle these requests.

First we check if the page requires any custom content, if so then we can use data from the content and use it to handle our request.
If not, then we just continue with a normal request.
Now let’s add our custom content to the page and give it a test run.
Step 5: adding the custom content to your page
For this step we will need a little bit of MySQL code. So here we go
First you need to have a template holder for the content page for new pages with the id of our template (in this example it’s 112)
Insert into content values(0,112,'*',99,'N','C',0,'carlist','5');
Second we will manually add the custom content to our page (in this example it’s id is 168)
Insert into content values(0,168,’nl’, 99,'N','C',0,'Aantal auto’s’,5);
Insert into content values(0,168,’en’, 99,'N','C',0,’Nr of cars’ ,5);
Step 6: enjoying our custom content
When we go to our page, we will see our custom content(on the right) and our normal content(on the left).

Now if we look in our dashboard to this page, the user can edit the custom content.

Now you know how to create custom content in Cody.

