In this tutorial we will create a basic controller and a template in Cody. We’re going to make a page where visitors can post a comment.
What do we need?
- A custom controller
- A custom template
- A little bit of MySQL code
Let’s get started
Start your favourite IDE (in this example we use WebStorm 6). And open the directory of your website.
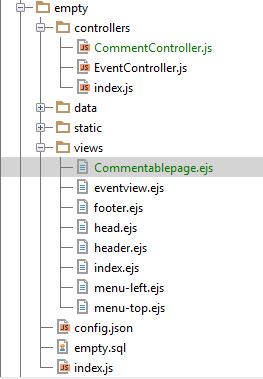
Create 2 new files CommentController.js in the controllers directory and Commentablepage.ejs in the views directory.
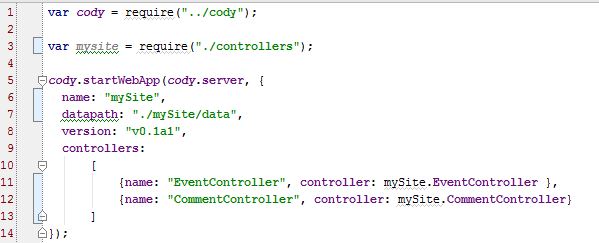
Now let’s start by adding the new controller in the index.js file of the website.
In the controllers array just add {name: "CommentController", controller: YourSiteName.EventController}.
Like this:
You also need to export the controller from the controller folder, that is done by adding “module.exports.CommentController = require("./CommentController.js"); “ to the index.js file of the controllers directory in your website.
Like this:
Next, we want to add our new template and controller to our database so the user can use our newly created template.
Under "Templates", create a new template (or duplicate an existing one), give it a reasonable parameters:
- name = 'Commentable-page'
- description = 'A page users can write comments'
- controller = 'CommentController',
- default view = 'Commentablepage.ejs'
- System = 'N'
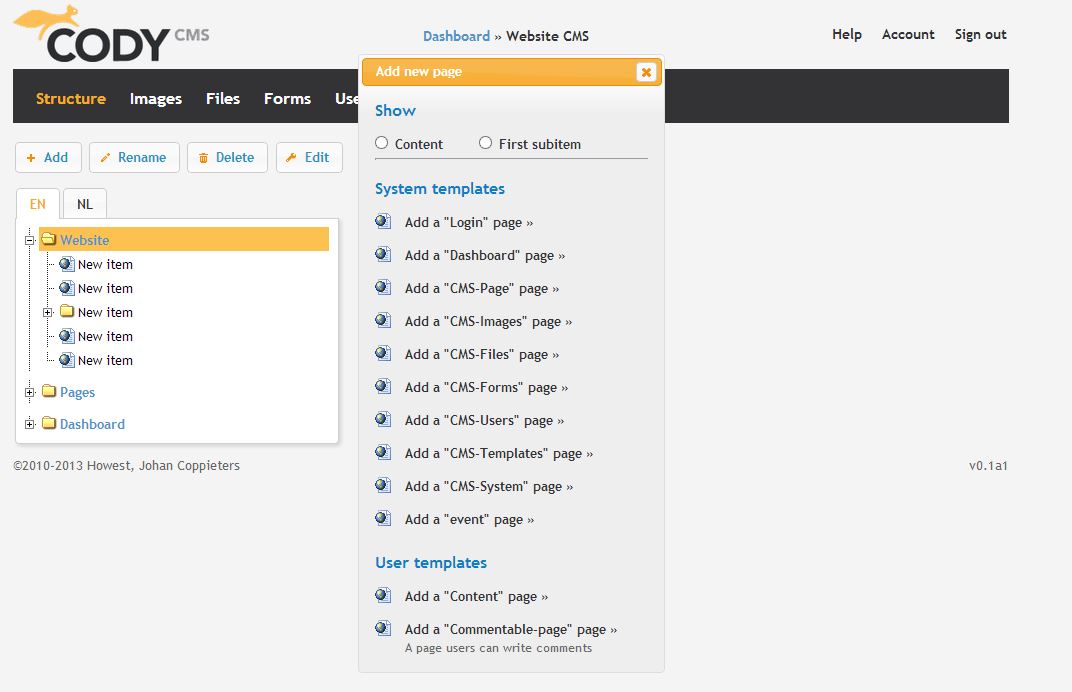
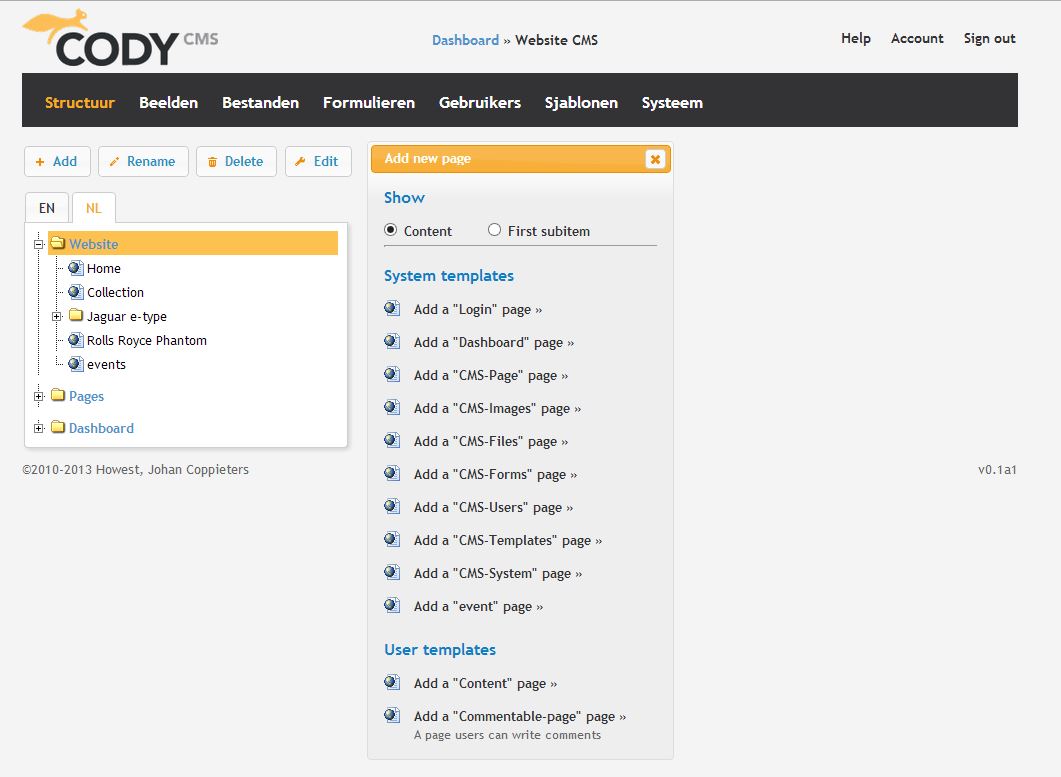
If you go to the dashboard of your website and add a new page, you will see that our new template is added to the list.
Let’s get rocking (coding)
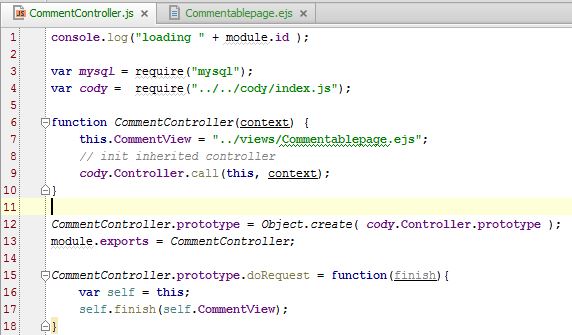
Let’s start with the controller.
Every controller needs a few things to work properly.
What you see here is some imports (the require statements) a constructor (function CommentController), an export and a doRequest function.
The most of the coding happens in the doRequest function or in some extra functions you write yourself.
The DoRequest function
This function will be called each time the controller receives a request, you can handle that request just the way you want. Just don’t forget to call the finish method and give the correct view with it as a parameter.
You might be wondering why we make a variable called self and then just assign this to it, this is to be sure of calling the wright object when we’re in a callback-function.
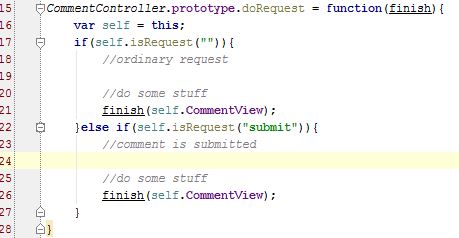
Let’s start by adding some code to handle our requests. You can easily check the type of request by using the isRequest() function.
Like this:
The value of isRequest() is mostly a value in a form (for instance ).Or what is after the URL (for instance http://codyweb.com/en/comment/submit).
Getting input from your page
When you write a controller you want input from your users, so how do you get the input from a form into your controller. Let’s start by creating a form in the Commentablepage.ejs file.
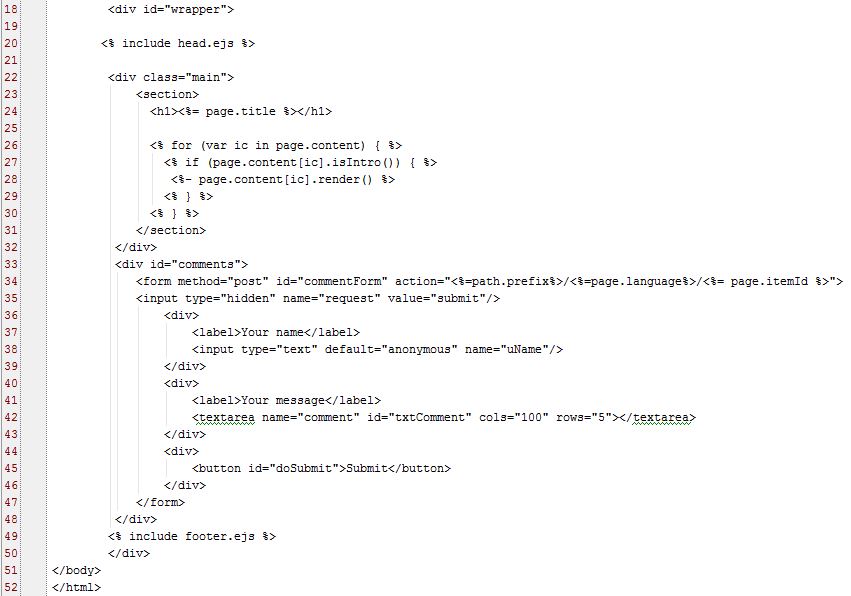
Start off by copying the index.ejs file to the commentablepage.ejs and add this code to it between the main section and the footer.
Like this:
When the user will click the submit button the doRequest function of our controller will be called, now let’s look at some code to get the data out of the request.
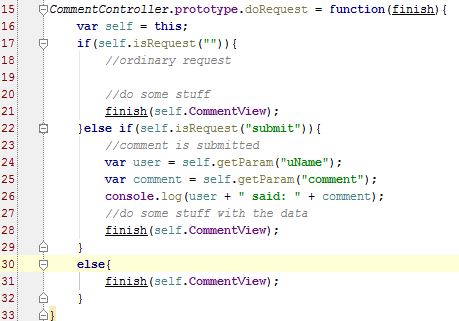
Getting data out of your request is very easy, just use the getParam() function of the controller object and you’re good to go, let’s try it out.
In the doRequest() function of our CommentController add the following piece of code.
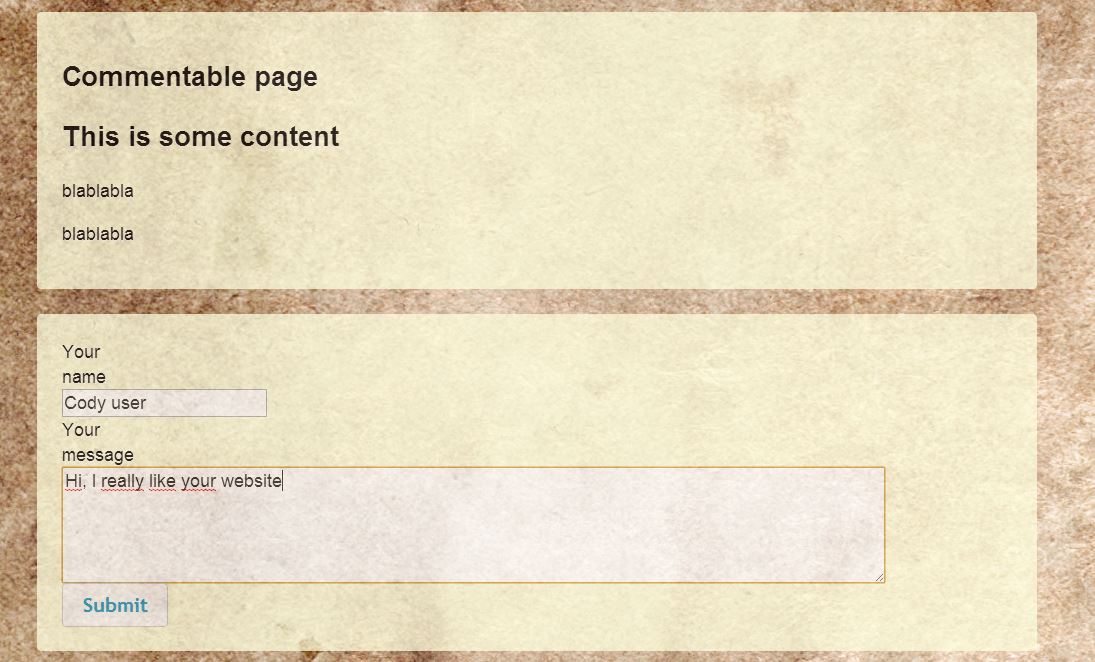
Let’s give it a try first. Start by adding a page with our “Commentable-page” template
Next we will visit our newly made page.
Fill in some data and click the Submit button.
Now if we look in our console we will see what the user has posted.
Storing data in a MySQL database
Now that we can get data from our users, we need to store it, what better place to do it then a MySQL database?
Let’s start with creating a new table where we can store our data.
In the database of your website execute this query:
CREATE TABLE `empty`.`comment` (
`idcomment` INT NOT NULL AUTO_INCREMENT ,
`user` VARCHAR(45) NOT NULL DEFAULT 'anonymous' ,
`comment` TEXT NOT NULL ,
`pageid` INT NOT NULL ,
`time` DATETIME NOT NULL ,
PRIMARY KEY (`idcomment`) );
We have our data and our database, let’s start querying. We will declare these queries in the constructor of our controller.
Like this:
Now that we have our queries, how can we use them? Well, we use the query method from the controller base class.
The query function has a simple syntax: query(query,parameters,callback). Let’s try it out.
We are going to write a new function addNewComment
Like this:
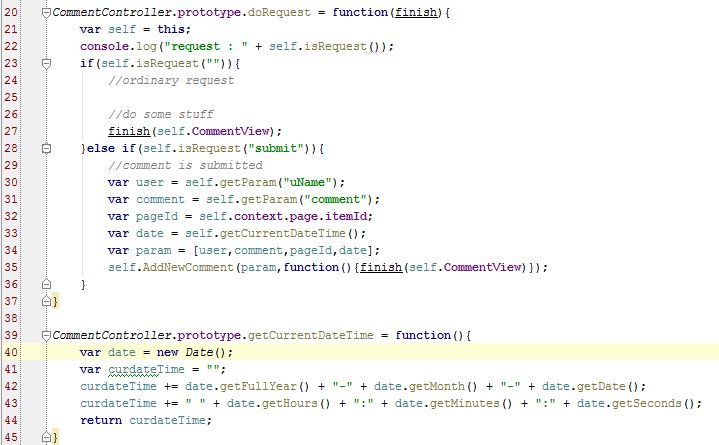
And edit our doRequest function (and add a getCurrendDateTime function)
Like this:
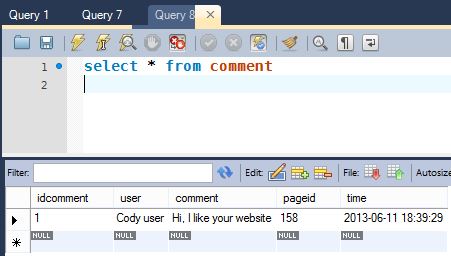
Now if we submit another comment on our website it should be inserted in our database let’s check it out.
Now that we can put data in our database, it is time to get it back out.
Sending data to your page
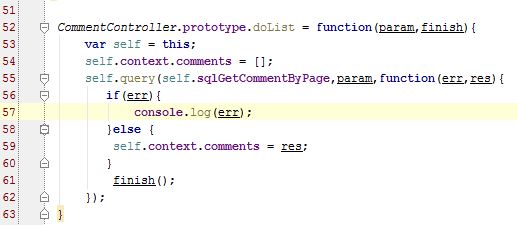
First we will write a function that gets the data from the database, stuffs it in a variable and returns the view, then we will modify the view to display that data.
Like this:
And then we modify the doRequest method for the last time
Like this:
As you see we replaced the finish function of AddnewComment with our new doList function.
Now it is time to edit our view so we can display the comments.
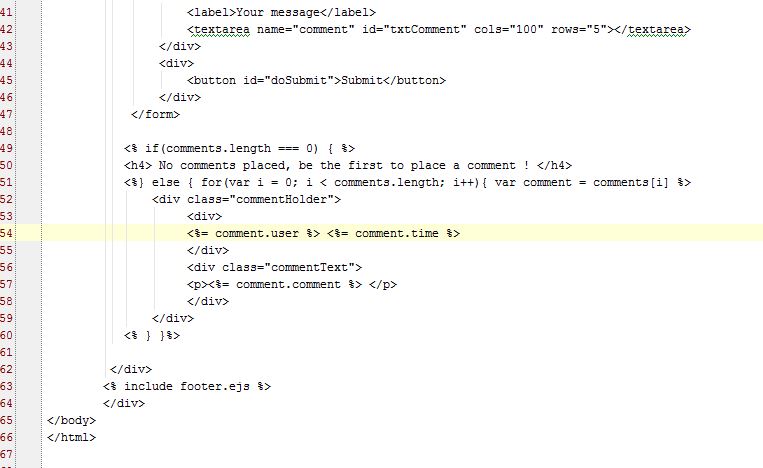
In the Commentablepage.ejs file we append some code after our form.
Like this:
Don’t be scared about the “<% %>”-tags they just contain JavaScript and a “<%= %>”-tag will display the value of that variable.
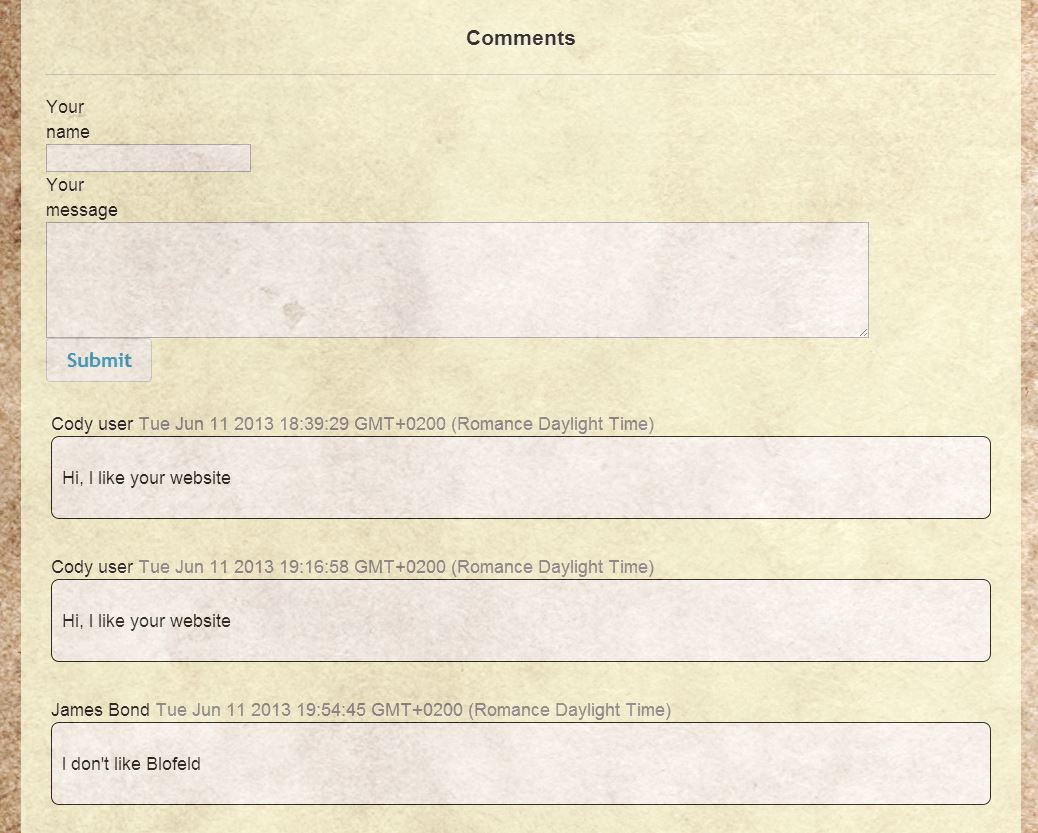
And with some additional CSS styling you will see this result.
Congratulations.
You have made your first controller !!
If you have any problems please contact the Cody team.

